How to Fix a Broken Hinge on Your Dell Laptop: A Comprehensive Guide
Introduction
A broken hinge on your Dell laptop can create numerous hassles, affecting both its functionality and your productivity. Whether it’s from regular use, accidental drops, or design vulnerabilities, addressing a hinge issue promptly is vital to prevent further damage to your device’s screen or chassis. In this comprehensive guide, we’ll delve into identifying hinge problems, preparing for repair, and executing the fix. We’ll also discuss when it’s best to reach out to professionals for help.
Identifying a Broken Hinge
Before you initiate the repair, it’s essential to confirm that a broken hinge is the source of your troubles. You may notice symptoms like difficulty in opening or closing the laptop, a wobbly screen, visible misalignment around the hinge, or strange noises during movement.
Conducting a thorough visual inspection can help diagnose hinge issues accurately. For this, you’ll need basic tools such as a small screwdriver set and a flashlight. Begin by gently maneuvering the laptop screen to identify any irregularities or excessive wobbling. Confirming the problem will make the subsequent steps more straightforward.
Preparing for Hinge Repair
Once you’ve identified a broken hinge, preparation is crucial. Proper planning ensures a more efficient repair process. Follow these steps to ensure you’re ready:
- Safety Precautions:
- Ensure the laptop is powered off and disconnected from any power source.
-
Remove the battery if it’s detachable, minimizing the risk of electrical accidents.
-
Essential Tools and Replacement Parts:
- Acquire a replacement hinge specific to your Dell model.
- Gather small screwdrivers and plastic prying tools needed for the disassembly process.
Preparation leads seamlessly into the repair process, where you’ll replace the damaged hinge.
Step-by-Step Repair Process
Tackling the hinge repair requires methodical execution. Let’s break it down into manageable steps:
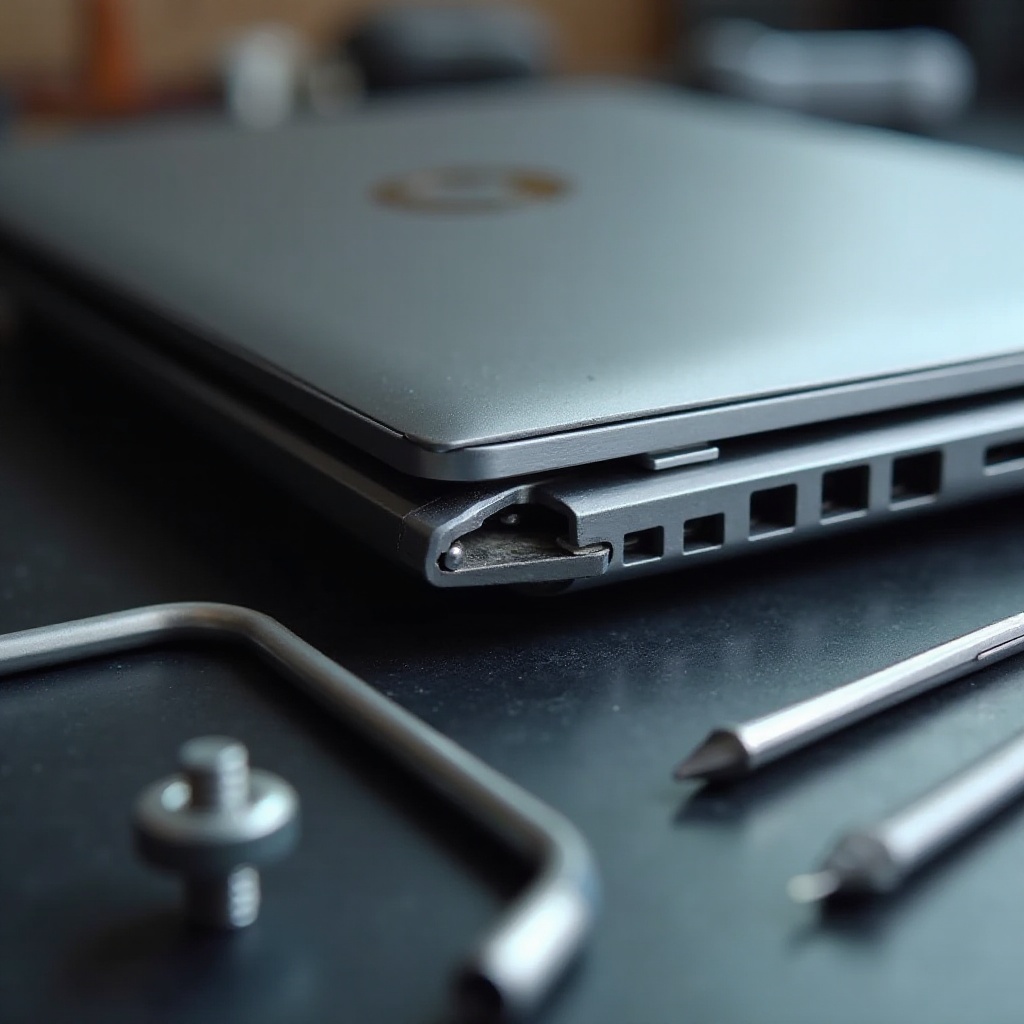
- Disassembling the Dell Laptop:
- Lay your laptop on a soft surface to prevent scratches.
- Use a screwdriver to remove screws securing the bottom case.
-
Carefully pry open the casing to access internal components.
-
Removing the Damaged Hinge:
- Identify the broken hinge by inspecting where the screen joins the laptop base.
- Detach any obstructing cables cautiously.
-
Unscrew and carefully remove the damaged hinge.
-
Installing the New Hinge:
- Place the new hinge into the correct position, ensuring alignment.
-
Secure it using screws, checking for stability to avoid wobble.
-
Reassembling the Laptop:
- Reconnect any detached cables and close the casing.
- Tighten all screws securely and reattach the battery.
After the hardware is successfully changed, ongoing maintenance will help maintain the repair’s integrity.
Tips for Post-Repair Maintenance
Ensuring smooth operation post-repair requires some simple checks and ongoing practices:
- Testing and Ensuring Functionality:
- Open and close your laptop several times to verify smooth hinge movement.
-
Listen closely for unusual sounds suggesting improper installation.
-
Best Practices for Longevity:
- Avoid exerting undue force when opening the laptop beyond normal angles.
- Periodically clean the hinge area and check screws for tightness to prevent future issues.
Maintenance helps safeguard your effort in repairing the hinge, but sometimes professional advice is indispensable.
When to Seek Professional Assistance
While many can successfully handle DIY repairs, there are scenarios where professional intervention is wise:
– If your hinge problem involves extensive damage to other components.
– If you encounter electrical complications.
– If the device is a premium model with intricate design specifications.
Consult a technician to prevent exacerbating the problem, ensuring a reliable fix for high-stakes issues.
Conclusion
Repairing a Dell laptop’s broken hinge is a feasible task, armed with the right tools and guidance. Whether opting for a DIY repair or consulting professionals, recognizing the issue and understanding how to tackle it can save costly replacements down the line. Following this guide, you’re well-equipped to restore your laptop’s functionality and extend its lifespan through careful maintenance.
Frequently Asked Questions
How can I prevent my Dell laptop hinge from breaking again?
To prevent future hinge issues, handle your laptop with care by avoiding excess force when opening or closing it. Regularly clean the hinge area and tighten screws.
What should I do if the new hinge feels loose?
If the new hinge feels loose, recheck the screws for tightness and confirm proper installation. If issues persist, seek assistance from a professional technician.
Are there specific Dell models more prone to hinge issues?
Some Dell models, particularly older ones or those with unique design structures, may face hinge problems more frequently. Research customer reviews for insights before purchase.